Wednesday, June 26, 2013

Polulu A4988 adventures

I've decided to take on the Polulu A4988 microstepper controller to see how it works.  I got the breakout boards from bdring (makerslide).


Starting point: learn how to solder breakaway pins to the breakout board.  One online training video, and then a few rounds of practice were in order.  I took a breadboard with some other pins and just tried again and again, soldering and de-soldering until I felt like I had the hang of it.
Practicing soldering pins to breadboard


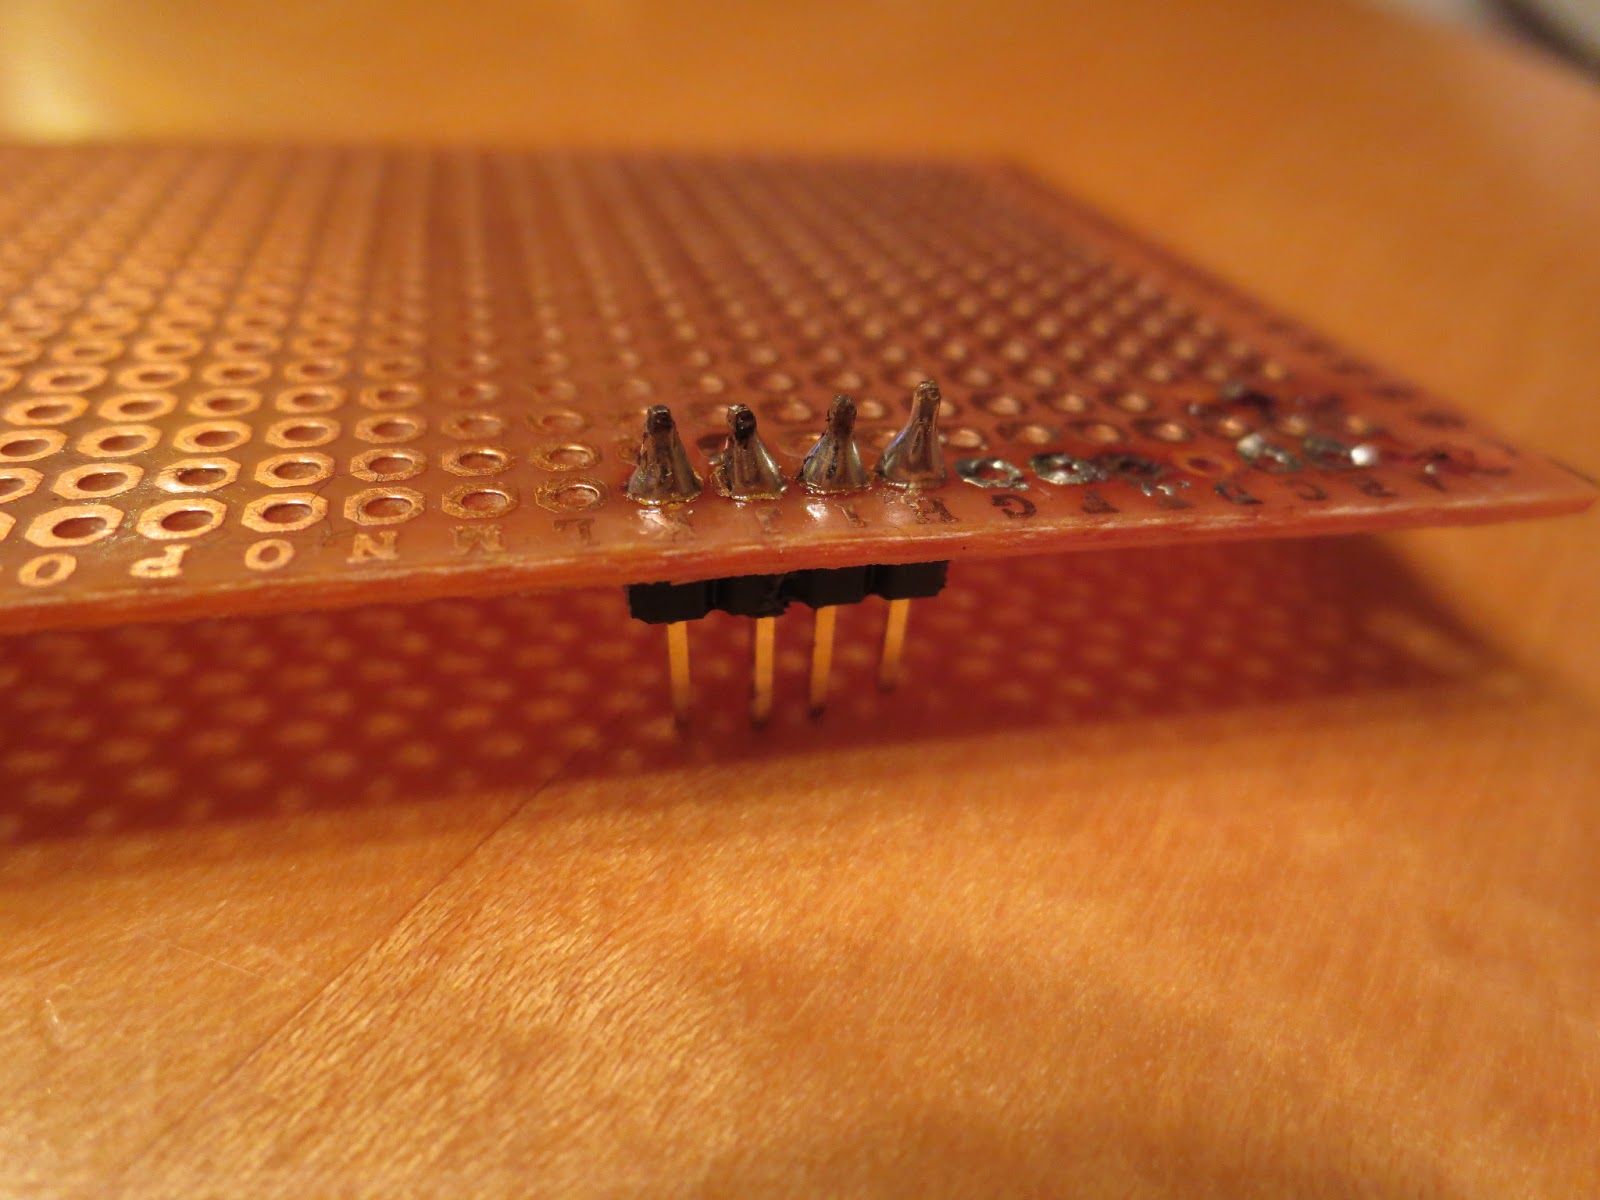
Step two: gather up the courage to solder the real boards.  The first one is on the right.  You can see some blackened scar marks on the pins.  I felt like I got better as I progressed, but then I'd check under magnification and see where I hadn't fed enough solder or allowed the solder to flow to the hole, and it wasn't really forming a good connection.  Eventually, they were all done and I think they look fairly decent.
Two A4988 breakout boards with pins soldered.  Disappearing pin illusion.
Next step: wiring it up to a breadboard and adjusting potentiometer to limit current.  Intent is to use this with the Teco DSH40EX24A, which is rated for 5.1V and 1.0A.

Some sites recommend touching a lead to the Vref point in the middle of the chip, but they also warn that it's a little easy to accidentally short some wires and fry the chip.  They also suggest that the board comes pre-adjusted for 1A current, so I'm feeling lucky and will just wire it.  Intent is to measure the full-step current using an ammeter in series with one of the motor coils, and tune the potentiometer.  It could over-amp the motor, but I suspect I've been doing that already in earlier projects anyway.  It's not clear from the doc if a clockwise or counter-clockwise turn of the potentiometer increases or decreases the resulting current, so I guess I'll find out... slowly.

With the chip flipped over as it is, and the potentiometer at the bottom, the pin assignments are
LeftRight
ENLOVmotor
MS1GND
MS22B
MS32A
RSTLO1A
SLPLO1B
STEPVdd
DIRGND
These are also depicted at http://www.pololu.com/catalog/product/1182

Also referring to stepperworld.com, it would not make much sense to run this chip at or below its 5V rating.  The point of having a chopper circuit is to be able to run it at a higher voltage, thereby enabling microstepping with sufficient current and hence torque.

Wiring to motor

2B = blue2A = yellow
1A = white
1B = red

Initial stepping was full-step, so MS1..3 were lo/lo/lo. 

Current adjustment

Turning the pot screw counter-clockwise reduces current through the coils.  Clockwise increases current.

I measured current on the motor coil red wire, wiring an ammeter in series with the coil.  Initially, my sketch would step once and delay, and then go again, so I'd check the ammeter at rest, but I could actually measure current by doing no stepping at all, since the system charged that coil on startup.

Initially, I found the system was measuring over 1A.  (Remember, when using ammeter, start with highest current rating first, then go lower.  In my case that meant using the 10A setting, which I think is common for ammeters, and that means putting the red wire into the 10ADC connector, not the V/Ohm/mA connector.)

Since the motor was rated at 1A, I quickly adjusted the current down to 0.98A.  Even at that level the motor runs quite hot.  I read that you really only need the amperage to provide the required torque, so I have dialed it down to 0.5A, and will readjust when the system is running with a real load, like a Frankenplotter lead screw and carriage assembly.

But then again, now I've read at the Polulu site about Current Limiting, and when using the method of measuring current in series with a coil, the "measured current will be 0.7 times the current limit", so "... to get a full-step coil current of 1 A, the current limit should be 1 A/0.7 = 1.4A".  This means that while I was reading a 0.5 A current earlier, I'd multiply that by 70% to get the actual current through the motor coil, meaning I was only sending it 0.35 A.  So I suppose when I first saw "higher than 1.0A" readings in the initial set-up of the motor driver, it might have been set up for a 1 A motor after all.  More to be investigated.

Microstepping resolution settings

I started with full steps, but then changed the MS1, MS2, and MS3 settings to try the microstepping resolutions, and also tried different pulse rates.
lo/lo/lo = full step
hi/lo/lo = half-step
lo/hi/lo = quarter = success at 400 microseconds delay
hi/hi/lo = eighth = success at 200 microseconds delay
hi/hi/hi = sixteenth = success at 200 usec delay and even as low as 50 usec, but at 30 usec I stalled.

Sketch and pulse timing

The initial sketch was running full steps -- just set direction, then step, delay, step, delay.  To perform a step, I would set the step line high and then low again before delaying.

The delay was simply a #define in the sketch, so I changed its value to try different pulse frequencies.

Later, I added direction switching with a longer delay between direction flips, so it would do 4800 steps clockwise with an 80usec delay, and then wait a half second, and then do 3600 steps counterclockwise, again withn an 80usec delay.

Heat
Initially, both the motor and chip were running quite hot, not enough to burn, but enough such that I could not hold onto the motor for any lengthy period of time.  I think there's more evenness in the heat with this current-chopping mechanism, compared to the old L298N driver, since we're trying to maintain even torque at all microsteps.  After all, we're sending the same amount of energy into the motor, or trying to, at all of the microstep resolutions, so that energy has to go somewhere.


I looked into heat dissipation techniques.  Many people heat-sink their Polulu A4988 drivers, and some heat-sink their motors.  In both cases, using fans is also an option.  But as a starting point, at least for the motor, reducing amperage to the motor is a good starting, hence I adjusted the trimpot so that output amperage is now 0.5A instead of 0.98A, and that appears to have had a good effect.  It's nice to see that the trimpot has that amount of range.

Conclusion
In the end, I have a somewhat hot motor, a somewhat hot chip and a 5.1V / 1A motor that can run at torque in 3200 steps per revolution at 0.5A.

Merit badges
- Solder pins to a breakout board
- Use a Polulu A4988 motor driver

Next steps
- Add a heat-sink, and optionally a fan, to a stepper motor
- Add a heat-sink, and optionally a fan, to a Polulu A4988 motor driver
- Change the basic sketch for this project to add some basic acceleration/deceleration
- Change the Frankenplotter build and wiring and sketch to use the Polulu A4988 instead of the L298N for the Frankenprinter carriage/lead-screw assembly

Sunday, June 23, 2013

Frankenplotter - lead screw assembly


I finally gave up on the bodged-together, geared assembly that I'd had on the Frankenprinter carriage that sat atop the Frankenplotter.

Spurred on by the last set of plots that showed mechanical drift, I drummed up the courage to try to build a lead screw-type assembly for it.
The "before" picture using the old Frankenprinter geared stepper + belt assembly, when it showed significant mechanical drift
I took much of my approach from the stuff I'd seen buildyourcnc.com, primarily the part where you take a 5/16" threaded rod and have it connect to a 5/16" nut that is compressed into a piece of wood.  In their case they used MNF and built the whole thing, including the bearings and glides/rails/slides, but for me I just had some Ikea scrap pine and an existing printer carriage.

Why 5/16"?  Well, mainly because that's what was shown on buildyourcnc.com.  The reason they chose that size was because it fit nicely into ABEC bearings that you can take from Rollerblades and the like.

Disassembly

I started by taking the whole Frankenprinter apart, so first I detached it from the Frankenplotter, and then off went the motor, gears, idle pulley and tensioner.  Then, I slid the rod out to free up the ink cartridge carrier, and that allowed me to unscrew the belt clamp from the cartridge carrier.  After re-assembly, all that remained was a metal base, a rod, and the carriage.

Carriage mount

I measured a small piece of wood that would be high enough for the rod, and then cut off some extra plastic pins that were in the way inside the carriage.  Then, I found another little piece of wood to elevate the motor so that the rod would clear the carriage edges.

The hard part was drilling a straight hole without a drill press.  I took one attempt and it was decidedly awful.  Start over, cut another piece of wood.  My second attempt was less awful, but acceptable.  It wasn't orthogonal, but it was pretty close, and I could get away with gluing the block into the carriage a little bit askew.

Drilling the block required two passes.  First, I marked the center point for the rod.  Then, I took a 1/2" spade bit and drilled into it part way.  That left me a hole that would eventually be used for holding the 5/16" nut.  Then, I drilled the rest of the way through with a 5/16" normal drill bit.  Finally, I filed away a little bit more from the 5/16" hole so that the rod would have some clearance.

Next, I pressed the nut into the 1/2" hole.  I used a clamp for that, and tapped it flat using a hammer.  There was nothing scientific about this.  As long as the spade bit hole didn't go all the way through, I could have used the technique of threading the rod on, blocking the other side, and pulling it into the wood until it stopped, but I just tapped it into place.
5/16" nut compressed into wood, threaded onto lead screw
I did some test rotations of the rod through the wood+nut, and it was a bit tight and a little wobbly.  No surprise given the rod came from the hardware store.  At least the one I had bought was the least bent of the bunch.  (It took me a while to pick this one when I was getting it at the store...)  I added some lithium grease to it, and it improved, so I felt good about proceeding.

I then cut the rod to length, hacksawing and filing off sharp edges in the garage, late at night.  After that, I lubricated the rest of the threading and ran the nut assembly back and forth a few times, using my hand drill as the lead screw motor.

Motor attachment

Then, I attached the rod to an anti-backlash 8mm-5mm coupler, and then to the Teco motor which has a 5mm shaft.  I'd tried this earlier, and found that the 8mm end of the coupler would *not* attach firmly to the rod, nor to some supposedly-8mm / 5/16" nuts that I'd gotten for testing.  So, I stretched some electrical tape and wound it (only once) around the end of the rod, and then stuck that into the coupler, and then tightened the coupler.

Yeah, taking pictures along the way would have been nice, right?

So at this point, it was
Motor -> 5mm shaft -> 5mm/8mm coupler -> taped end of rod -> wood assembly with nut

At this point, I broke my normal rule of "NO HOT GLUE".  I didn't have any better way to affix the motor to the carriage, short of epoxy.  I would have preferred to have built some kind of L-bracket mechanism with holes that could be used for the 4-40 screw points that exist on the motor, and I may yet make one of those at the Tech Shop.  I also had no clean way to attach the wood block end to the printer carriage.  So out came the hot glue gun, and that was a little tricky, because I was trying to hot-glue two things at once, using glue that dries up quickly, while simultaneously trying to keep the rods aligned.
Lead-screw-type Frankenprinter carriage connected to Frankenplotter.  You can see here that the lead screw is not aligned well with the edge of the carriage frame, and thus is slightly out of alignment relative to the slide rod.
Back side of carriage, lubricated lead-screw through nut.  Block assembly glued onto original ink cartridge carriage.  Same old pen up-down assembly clamped to carriage.
In the end, well, it's *mostly* aligned.  Not my best work.  But it works, and so I'm loathe to undo it and redo it, since it required that tricky maneuver of dual-hot-gluing.

Electronics

I then had to figure out the electronics.  Fortunately, I'd documented all my motors' inputs and outputs and timings when I took a motor inventory earlier, so getting the right wires to the right motor board outputs was easy.  Getting the timing just right wasn't quite so easy.  The timings I'd taken were for a free-spinning motor with no load.

Software

All I really needed to do in the software was update the resolution setting for the motor.

Computing resolution was easy.  I'm using a 5/16"  / 18 rod, so that's 18 threads per inch.  The motor is a 1.8-degree stepper, thus 200 steps per revolution, or 400 half-steps per revolution.  So, the number of centimeters traveled per half-step is
2.54 cm/in divided by (400 steps/rev * 18 revs/inch), or 2.54 / 7200 cm/step.

That's all I should have needed to do.  In reality, there were other points in the software where I'd messed up scaling, so that got fixed later.

Results

This is the "after" picture, after I'd gotten the initial plots working.  Compare this to the picture at the top of this post.
"After" picture, mechanical drift problem solved, I think.
The other software problems I encountered were mainly due to problems with coordinate systems.  In going to a system where the Y axis was now higher resolution than X, I moved some of the code around that compensated for rectangular pixels, and messed up. 

I also was now in a world where my base resolution was so fine that I had to change the scale of the plot, else I'd end up with a really, really small drawing.  In the older system, I had a scale of 4.5, and now I have a scale of 60 or more to get similar output.  The right thing to do here would be to have a proper graphics pipeline matrix computation in going from the virtual pixel world to the physical pixel world.

Tweaking

I still was getting some drift at this point, mainly because I had not done much to get the pen up/down assembly to the right height.  It was too low, so the lower metal bracket allowed too much freedom of motion in the pen.  It's subtle, but here are the before and after pictures resulting from changing the pen carriage height.
Full drawing, pen somewhat loose
Full drawing, pen still a little loose, but better.

So at this point, it's a success!  I have actually produced drawings twice in succession without mechanical drift.  I'm not sure why the drawing of the nacell interior appears to be a little high.  It's almost like I'm getting a little drift in the opposite direction of what I'd had before.

Merit badge:
- Build and operate a lead-screw-type assembly to control linear movement

Next steps:
- Consider online resources that suggest using a 300mW laser to do etching.  I couldn't do this without knowing I had drift and math problems resolved.
- Find other plot sources in GML, HPGL, etc. (Initial online searches have not been very fruitful.)
- Find legacy, physical plots from very, very old documents that I've kept over the years, and vector-ize them and plot them.
- Use the Allegro breakout boards that I bought from bdring as a straight swap-in, just to learn how they work and see if they can provide better current / motor power management
- Add limit switches or optosensors or similar to prevent damage
- Add an SD card shield to reduce the overall plot time, since much of the time is burned on I/O right now.
- Expand the plotting bed size.  Return the original picture frame glass, and get something bigger to serve as the new plot bed.
- Move on to the NEMA17-based X-Y-Z stage I got from Halted!


Saturday, June 22, 2013

Frankenplotter - Cubic Bezier curves in SVG and Java, still getting drift

I went ahead and coded up the Bezier curve processing code.  I get it now.

Quadratic Bezier curves are like string art.

Cubic Bezier curves are like string art within string art.

The SVG involved had "c" (lowercase "c") commands, which are relative-positioned curves.  The data starts with a "c" and then one or more triplets of x,y coordinate pairs.  So it's like this:1.  You're at current x,y
2.  You see a "c"
3.  You get three x-y pairs of values -- I'll call them dx1,dy1 through dx3,dy3 -- that are all relative to current x,y.  So in the end, you have
(x0,y0) being current x,y
(x1,y1) being current x,y plus dx1, dy1
(x2,y2) being current x,y plus dx2, dy2
(x3,y3) being current x,y plus dx3, dy3
4. The four control points allow for computation of the cubic Bezier.
5. Draw the curve.  Pseudocode:
For time t ranging from 0.0 to 1.0
  At each time t, you get a relative position along the pt0..pt1, pt1..p2, and pt2..pt3.  So, when t is 0.1, you go one tenth of the distance along pt0..pt1, one tenth along pt1..pt2, and one tenth from pt2..pt3.  I named these interim points q0..q2 in the code, probably because that's how they were named on the Wikipedia page.
  Then, do it again.  Find points a "t"-relative distance between q0..q1 and q1..q2.  Those form points r1 and r2.  Ok, I'm not great at numbering my variable names.
  Then, do it one more time.  Find the "t"-relative distance between r1 and r2, and you end up with newx,newy.
  Draw from the current position to newx,newy
Go to the next "t" value, and make sure "t" ranges all the way from 0..1, including the endpoint t=1.

5. When you're done with that triplet,  update the system's "current x,y" value to be the same value as seen in the final control point, so currentx = currentx + dx3, and currenty = currenty + dy3.

If you see multiple sets of triplets of points, it's what's called a polybezier.

To make sure I got it right, I wrote up some quick code in Java (probably should have done this in the first place...) to draw vectors on screen, rather than send them to the Frankenplotter.

I did the coding brute-force.  From a microcode perspective, it's faster to pre-compute the steps along the control points so you don't do multiplying and dividing so much, at least for that portion.  Some slightly higher-level math could be added in to do similar "add instead of muldiv" approaches for q and r.

I also set up the code such that all parameters to the function are absolute values for ease of reading.

The code assumes you've set up a Graphics object on a Panel somewhere.

It also assumes some control booleans have been set up beforehand.
drawBezierControlVectors - draws the control point vectors in red
plotBezierControlVectors - generates absolute-position L commands (line-to xabs,yabs)
plotSendBezierControlVectors - generates some special C,D,E commands for the Frankenplotter so it can do the Bezier drawing itself.  More on that later.
drawBezier - draws the Bezier curve on screen in blue
plotBezier - sends L commands for all the interim points of the Bezier curve.

On other web pages you'll see that one technique you can employ is to choose the step size when marching t from 0.0 to 1.0, typically making it dependent on the hypotenuse sizes of the control vectors.  You can also split the control vectors into sub-Beziers for that purpose.  In doing so, you can avoid large vectors on large legs of a Bezier, and also avoid having too many microsteps on small control vector sizes.  I might do that still, but I took the empirical approach of looking at various step sizes on screen to see how many steps it would take to get a good-looking result.  For my drawing, I got about the same visual rendition at 4 steps and 10 steps.

Here's the code:

    private void bezAbs (Graphics g, double x0, double y0, double x1, double y1, double x2, double y2, double x3, double y3) {
        double dx1 = x1-x0;
        double dx2 = x2-x1;
        double dx3 = x3-x2;
        double dy1 = y1-y0;
        double dy2 = y2-y1;
        double dy3 = y3-y2;
        double mycurx = x0;
        double mycury = y0;
       
        if (drawBezierControlVectors) {
            g.setColor(Color.RED);
            drawLine(g,x0,y0,x1,y1);
            drawLine(g,x1,y1,x2,y2);
            drawLine(g,x2,y2,x3,y3);
            g.setColor(Color.BLUE);
        }
        if (plotBezierControlVectors) {
            fout.println(pointStr("L",x1,y1));
            fout.println(pointStr("L",x2,y2));
            fout.println(pointStr("L",x3,y3));
        }
        if (plotSendBezierControlVectors) {
            fout.println(pointStr("C",x1,y1));
            fout.println(pointStr("D",x2,y2));
            fout.println(pointStr("E",x3,y3));
        }
       
        int bezSteps = 4;
        for (int ti=0; (drawBezier || plotBezier) && ti<=bezSteps; ti++) {
            double t = (double)ti / (double)bezSteps;
            double q0x = x0 + t * dx1;
            double q0y = y0 + t * dy1;
            double q1x = x1 + t * dx2;
            double q1y = y1 + t * dy2;
            double q2x = x2 + t * dx3;
            double q2y = y2 + t * dy3;
            double qdx1 = q1x - q0x;
            double qdy1 = q1y - q0y;
            double qdx2 = q2x - q1x;
            double qdy2 = q2y - q1y;
            double r1x = q0x + t * qdx1;
            double r1y = q0y + t * qdy1;
            double r2x = q1x + t * qdx2;
            double r2y = q1y + t * qdy2;
            double newx = r1x + t * (r2x-r1x);
            double newy = r1y + t * (r2y-r1y);

            if (drawBezier) {
                drawLine(g,mycurx,mycury,newx,newy);
            }
            if (plotBezier) {
                fout.println(pointStr("L",newx,newy));
            }

            mycurx = newx;
            mycury = newy;
        }
    }


And here are screenshots

Bezier control vectors in red, blue are the few LineTo straight line commands.  The drawing is primarily comprised of cubic Bezier curves.

Bezier controls overlaid with blue generated Bezier curve vectors

Bezier curves without control vectors showing
Note on the lower, left side of the picture, and in the center area, the result is a much smoother curve. 

Generating this on screen gave me a proof point that the Bezier curve code was working.  So as an initial test, I added code to write output to another vector file, and passed through appropriate values for L and M (Line-to and Move-to, absolute) commands.  Then, I added the code for the plotBezierControlVectors, making it generate more L commands for the Bezier sub-vectors.

I did notice that in the original SVG, there are "z" commands, which I took to mean "close curve to original x,y location you started at the beginning of the polybezier.  But I added that into the code and it just made things offset all over the place.  So at this point, I treat the "z" command as an "I'm done sending you Bezier point triplets", which for my purposes means I can just ignore them.

I ran the generated file of L and M commands (prefixed with an S4.5 scale and suffixed with a Z to finish the drawing, and disable motors and solenoid), and it looked promising, but took a long time because of the RXTX send-acknowledge sequence with every little vector.

So, I changed the code to send the Bezier commands to the plotter, and shifted the Bezier drawing computation to the Arduino sketch.  To make things consistent with other commands, I chose one character each for the absolute-position Bezier control points 1,2,3 and called those commands C, D, and E.  All three cause storage of the control points in persistent variables, and upon receiving the E command, the sketch puts the pen down, and draws the Bezier curve.  That was much faster.  The resulting drawing looks nicer, as you'd expect from seeing the on-screen renditions.

Still, I am getting drift problems.  I determined that some of it was mathematical, but some of it is mechanical.  The mathematical part was diagnosed by sending circle=720 commands to the plotter at 400 units from center, thus generating a ton of very small vectors.  I was disappointed to find that I was getting consistent X-axis offsets when doing that.  I restructured a lot of the sketch code to have a clean separation between a "virtual" coordinate world, and a "physical" coordinate world.  The physical world is all integer-based as it represents the number of steps moves by the plotter, whereas the virtual world is in double-precision floating point.  Once I did that, the X-axis drift went away.  I can only assume there was some similar Y-axis drift occurring.

But, the Y-axis still showed drift. 
Y-axis drift, drawing stopped.

I tightened the belt on the Frankenprinter carriage and clamped it down better, and found that a good portion of the offset problem went away, which strongly suggests that what I'm seeing is mechanical, not a problem in the code.
Same code, but with Frankenprinter carriage belt and idle pulley tightened.

One thing I am considering doing is to heat-sink the motor, but I think there's more going on than that, and I can't really rely on the motor to get me what I want.  So I think my next step is to go to the Teco motor, anti-backlash coupler, and a 5/8"-18 threaded rod as a lead screw, and somehow have it connect to the printer carriage so that it moves on an extended worm gear system.  That'll give me 1.8 deg turns (200 steps per rev), 18 full steps per inch, therefore 3600 full steps per inch for resolution, or 2.77e-4 inches per step, or 0.00705555 mm/step at full step.  At half-step, I'd get half that, or 0.00352777 mm/step.  More importantly, I should end up with a build that I can trust for moving the carriage as far as it's supposed to move, though in using steppers without feedback, I don't really have anything to check to make sure it got there.  (I want to mess around with the cool rotor mechanism I found in the H-P 720 printer to see how it'd work.)

I've already disassembled the Frankenprinter so it's just a base, rod, and carriage now -- no pen assembly, motor, gears, or belt -- and am measuring it at points to see how it might accommodate a lead-screw-type mechanism.

Wednesday, June 19, 2013

Frankenplotter - a little rain must fall - but then success!

So not everything was trouble-free yet for the Frankenplotter!

At some point, the old plastic clips that held the scanner's idle pulley broke.  I had to use the Emergency Stop button on the system (i.e., yank out the USB cord) when that happened.
Fortunately, no significant harm was done.  It only took a few screws and washers to tighten that down again.

The bigger problem was one that I hadn't noticed in earlier drawings.  The drawing itself was coming out wrong.  There was drift in the Y axis, but in retrospect that might have drift in both axes, but it was just more noticeable in Y because of the resolution difference.

I lubricated the system and things got a little better, but still it wasn't quite right.  I also scaled up the drawing and came up with more error, but it didn't appear to be linearly scaled error.  The two images below are drawn at different scales, and you can see that the error offsets appear to be Y axis only, and are different depending on scale.


As it turned out, I did have mechanical drift problems -- too much resistance / insufficient torque on the printer carriage -- but also had a rounding error in the code.  It was one of those "I thought I took that into account" moments, but when I converted the current x,y position tracking variables to be floating point instead of integers, it all came out better.

Here's the semi-final plot!
Success at last!
With this done, I feel pretty confident that I have the level of precision I want in X and Y axes -- at least as much as I can get from this build.  And if I move on to using lasers, I won't have all the mass of the pen up/down assembly to carry around.

Next steps:
- Figure out cubic Bezier splines so that I can send c/z commands instead of having Inkscape flatten Beziers
- Go to a laser engraving system
- Configure the system to control motor movement rate so that it doesn't move in X and Y too quickly.  If I'm doing laser engraving, I want the motor movements to go at a steady pace.  Basically, this means slowing down the Y axis movements by increasing its motor delays at the risk of having jerky motions
- Expand the plotting/engraving surface, or do what Mike suggested: cut out the base of the Epson 4180 and mount the whole assembly higher for doing laser work.
- Go to the next precision X-Y-Z stage that I got from Halted the other day (oooooooo!!!)
- Figure out some other plots to draw

A few of the things I'd love to find, if they're available anywhere, are the old vector drawings that we used to use at Nicolet Zeta for burn-in tests.  The ones that were memorable, to me, were the ones of the old WWII airplane diagrams.  I wonder what happened to the Nicolet Zeta / Nicolet Instruments Corp / AM Bruning assets.

Tuesday, June 18, 2013

Frankenplotter - pen up/down

Where we last left our Frankenplotterhero: X-Y axis movements appeared to be working well, and data was getting to the system via a Java-TTY-Arduino call-and-response mechanism.  I let that run through the entirety of the vector file, and this is what I got:
First significant plot output with test star and "circle" drawings, and first drawing of ship to completion
Another plot without the star/circle test drawings, but with no pen up/down control
The inability to raise the pen was making for a lot of scribbles on the page.  I figured the best explanation was that this was a depiction of the ship traveling at warp speed.

The next step, clearly, was that I needed to find a way to raise and lower the pen.  While doing that, I'd also find a way to get more rigidity at the bottom of the pen so there would be less curvy lines.

Mike and I discussed different ways to get this done, and ended up choosing a solenoid-based approach.  I'd never used one, but went at it with the brash confidence.  I found three solenoids and reasonable slugs at Halted.  I was fortunate in that I had a range of voltage choices -- 5V, 12V, 24V -- since I could get any of those from the various power sources available (either the Seasonic ATX motherboard power supply, or 24V from a salvaged Canon printer power supply).  I ended up selecting a 24VDC solenoid that had a slug where the end of the slug had a funny clip attached.  That gave me different connection options that the other slugs didn't.

To run the solenoid, I simply wired it to through the SainSmart 4-channel relay.  It was loud, but convenient, and could easily handle 24VDC and the amperage required by the solenoid.

Mounting the solenoid and pen was a total hack job.  I chopped up a ball-point pen and used pliers to weaken the top so that I could shove it into the clip at the end of the solenoid slug.  Then, I used whatever wood and metal pieces I could to make it the right height.  The original piece of wood that I'd used for the earlier pen holder turned out to be just the right width to fit in-between some plastic prongs on the printer ink carriage.
Solenoid up-down pen assembly clamped to printer carriage
In this design, the solenoid would activate, raising the pen.  Gravity would let the pen down, and a hole in the metal bracket would help align the pen to a particular location.  It took a bit of fudging things to that the lift and drop wouldn't run into things.

After some tests, though, I wasn't getting much ink on the page, partly because it was a less friendly ball-point pen than I'd used before, and partly because there wasn't much downward pressure on the pen.  Fortunately, I could add a rubber band and clip it to another piece of metal on the mounting bracket so that the pen would be pulled down towards the paper, rather than just relying on gravity.  There was sufficient force in the solenoid and the assembly left the slug close enough to the solenoid hole so that the pen could be lifted, despite the rubber band's downward force.  In the pictures below, the tan-colored rubber band is the one pulling the solenoid slug and pen down.


Merit badge:
- Use a solenoid!

Mini CD drive tray mini-project

This was a little project: tearing into a laptop's CD/DVD drive to see how it worked.  I probably should have, but didn't, salvage the laser LED.

After taking out all the innards, I was left with this cool little assembly.  It would drive the "sled" (the thing that moves the laser in and out from the center to the edge of the disc) using a worm gear drive.

The little square chip is a BH6546KV.  I didn't think I'd do much with this, but for fun I did some brute force testing, sticking a power line somewhere, and dragging a ground line across pins to see what might happen.  I found that on the bank of lines closest to the wheel, I could get the motor wheel to turn a 3-step motion.  Only then did I actually look up the datasheet to see where the pins were.  The chip is an impressively capable thing that handles the sled, focus, and motor drive, so it's a nice all-in-one package.

I wasn't sure if I'd go ahead with this but eventually got up the nerve to try to solder to the tiny pins of the chip.  The fortunate thing with this chip is that the motor output pins for each of the three steps uses a shared pair of pins.  That is, there are two pins that are the same for each step point, yielding a total of six output pins, but wired as three pairs.  That gave me a prayer at soldering to two of them at once, i.e., a solder bridge wouldn't hurt.  Result:


I had also connected a red wire to the resistor shown, because I'd found that connecting a battery to it, and touching one of the yellow/white connection points to ground would move the motor.  Later, though, I found that that red wire connection was shorting something, so it isn't used.  But, it was useful to have for testing the solder connections of the white/yellow wires before moving on.

After several soldering attempts, I got a good enough connection, so I wrapped the wires around the board and taped them down to avoid straining the connections.  I then checked the motor for its current draw, and found that it draws 0.74 amps.

After that, I wired things up in a dodgy system as seen here:
I'm using the same L298N motor controller board as was used for the WBMD but only three of its inputs and outputs.  By driving the lines high/low in different patterns, I could get the wheel to spin at various speeds, and effectively get half-stepping.  With acceleration code, I could get it to spin at a pretty high speed (aka low delay, high pulse rate).

When I added an actual disc to the system, I found that it wouldn't work all that well.  There isn't much friction holding the disc to the motor, so you have to ramp the speed up slowly.  Also, there's a lot of springiness to the motor, so after doing a single step, there's a lot of backlash.  I'm sure there's quite a bit of science that could be applied such that through clever and quick sequencing of motor turns, it can get up to speed smoothly and quickly.  What I did instead was start slowly, and ramp slowly up to a point where the disc was spinning, and then I kicked in rapid acceleration code.  It reminded me of a World War I-era biplane, where someone shouts "Contact!" and it sputters to life, sometimes dying out, sometimes revving the propeller up to full speed.

I had hopes that maybe I could make some kind of robot assembly with this, using the CD/DVD as a wheel, but with so little friction, that wouldn't work.  Or, I'd need some other way to increase the friction in the connection between the disc and motor.  I'd have better luck with the DVD assembly that I pulled out of a purple boom box -- but that's for another blog page.

The system makes some very fun motor sounds, and the L298N motor driver gets fairly hot, so I'm probably over-driving the current or something.

I'm chalking this one up as a "Why?  Because it's there." project.

Merit badges:
- Solder wires to a tiny chip
- Make the CD/DVD mini drive do tricks

Frankenplotter - drawing more than just circles and stars

Having discrete commands that drew specific shapes was all well and good, and gave me a decent idea of the functionality of the Frankenplotter.  But I wanted it to do something more, so I started browsing the web for various test vector files.

Eventually, I found one of a Starship Enterprise in .svg format, and figured that would make a good test case.

I inspected the file and found its <path> element.  The file was made up of a number of move and draw commands, but most of the drawing was being done with "c" and "z" commands for drawing relative-positioned cubic Bezier curves with closure. I was too tired for math and needed something easier.

So instead, I installed Inkscape and found ways to flatten the Beziers and save the whole thing out again.  This devolved the output to M and L commands (move absolute, draw absolute).

I added "input" command handling to the Arduino to understand the M and L commands.  For the first M command encountered, it doesn't actually move (since there is no concept of origin), but establishes an origin value for wherever the pen currently is.   It assumes I've pre-positioned the pen at some reasonable location on the page for starting the drawing.  Subsequently, every M or L command that comes along is used to determine a delta x, delta y movement.  After each movement, I update the "current location" variables.

I tried sending the whole file over to the Arduino, using a terminal window on the Mac, and plain Unix commands (cat filename > /dev/tty.usbmodem621, or something like that).  It would work for the first ten or 11 lines, but then crap out.  It was intriguing seeing the system react to the first several lines, and disappointing to see it stop.

As it turned out, the reason the program would crap out after ten or eleven lines was that I was overflowing the Arduino's Serial.read buffer, and that effectively killed the whole approach.  Serial functions in Arduino land are not blocking.

I tried another solution with a bit of Perl for sending the commands to the Frankenplotter, rather than just using cat.  The perl script would throttle the data transfer by sending a line, and then delaying a fixed amount of time.  That would give the Arduino a chance of keeping up.  With some tuning, the script worked, but it made things painfully slow.  Really, I had to be careful of the long vectors which would take a long time for motor movement, so I had to make my throttling delay long enough for the long vectors.  But for short vectors, I'd draw a little bit and then I'd go into the wait state for the Perl to send another command, and with so many short vectors, it would take forbloodyever.  I could have adjusted the code to be sensitive to the hypotenuse of each vector, and then compensated for estimated motor timing in each axis (since one moves faster than the other).

Instead of fixed or estimated delays, I knew the right solution required a call and response.  I needed a way to send a command, and wait for a response.  That required bidirectional communication.  For Perl, that meant getting some TTY libraries I didn't have.  I tried using ppm to download and install them, but building those required a C compiler, and since I was running Mac OS 10.6.8, I couldn't install the C compiler without becoming an Apple developer.

So then I switched to Java.  I found rxtx libraries that I could download, but then found that they weren't available in for my chipset architecture.  But in searching and trusting a site out there, I found rxtx 10.6.8 libraries for 32-bit and 64-bit.

Once I had that, I changed the Arduino code to return a "Z" character to the TTY port after each motor movement was completed.  The rxtx example code didn't do exactly what I wanted, but it wasn't too hard to figure out how to write my own code to suit my needs.  I made it so the Java code would send its M or L commands, and then wait to hear a Z before sending another one.  That worked!  Here's an example of how things started looking.


The scaling was hardcoded in the program, so eventually I added two more commands: S would allow establishment of a scale factor, and Z would indicate file completion to the Frankenplotter, allowing it to disable motors.  I also used Excel to analyze the full vector set to see max, min, and origin information, and that gave me an idea of where to put the pen before starting to draw.

To avoid the divots in the scanner bed, I stole a piece of glass from a picture frame, and taped it inside the scanner bed to act as the drawing surface.  I also took out any remaining electronics from the scanner bed.  The height of the glass surface forced me to cut off a plastic fin from beneath the scanner carriage, a fin that was originally used by the scanner to do hard-limit detection (using an optosensor that the fin would slide through).

You can see that I still don't have a pen up/down function, so there are lots of goofy lines drawn within and across the image.

Monday, June 17, 2013

Frankenplotter star and circle - to prove x=minor, y=major works

Having the testxy function draw diamonds was one thing, but I knew it wasn't really exercising the full range of major-minor combinations.  In that case, since the scanner carriage was 11x higher resolution than the printer carriage, it really was only drawing x-major, y-minor vectors.

So, I added two functions: star and circle.  star=n would draw an n-pointed star using a distance specified by the csn=value command.  The inner radius of the star was fixed.  The circle command would take a value representing the number of arcs to draw starting at 0 radians, so circle=4 would produce a square (diamond), circle=8 would give an octagon, and so on.

Results:
Frankenplotter drawing circles and stars
You'll note a couple of things here.  First, there's a line going from the center out to x=radius,y=0.  That's because there's no pen up/down function yet.  Second, the circle doesn't close.  That's because of sloppiness in the pen holder -- lack of rigidity.

Just to be sure I was exercising the x=minor,y=major case, I had Serial.print commands telling me what was going on.

Frankenplotter replacement carriage, dual-axis stepper motor control

After much experimentation with the Brother carriage, I gave up on it.  I was willing to deal with the motor, but I couldn't seem to mount anything successfully to the printer head assembly.  There were springs in various places that were meant to snap the ink cartridges into place, and so on, and they all just got in the way.  Eventually, I tore apart enough of that printer head that I took too much off, and it really just wouldn't work.

So, I went back to the original Frankenprinter carriage, the one that I'd gotten from the H-P printer.

Along the way, I'd picked up some more gears.  And to my surprise, I found something that I thought would work to provide higher precision to the Frankenprinter.  That meant removing the stepper motor I'd put into it, the one with a brass pinion, to which I'd glued a washer so that it'd act as a flange to prevent the belt from slipping off).  In a kids-don't-try-this-at-home maneuver, I found that a razor blade lightly tapped between the pinion and washer did the trick.

To my surprise and delight, I was successful in cobbling together a motor and gears with the right pitch size and diameter, and mounted that upside-down to drive the Frankenprinter carriage!  Here's a picture with the new motor in place.
It turns out that I didn't have anything to mount the motor to, but haven't need to do that yet.  Its pinion is now connected to the double white nylon gear, and the smaller part of the double gear connects to the belt.  I am able to get away with just using cellophane tape to hold the motor in place at that end!  With that in place, I was down to about an 11x multiple in resolution between the high-res scanner and the somewhat-high-res Frankenprinter.

So then I was faced with the technical challenge: how do you move two stepper motors at once to draw a straight(ish) line, while also handling different resolutions and acceleration factors for each?

Dual motor control

As it turns out, the work I'd done up to this point was all feeding into how the two-axis system would work.  So let's get into the basics of two-axis control.

I didn't want to follow the path of the Frankenstein Laser Engraver.  For that system, they re-flashed their Arduino to use GRBL so that the system could understand gCode.  And while that's great, I only had the one Arduino, and didn't want to run the risk of being without it for other project purposes.  That said, I did order up a second Arduino Uno R3 in case I wanted to go down that path.

That left me with rolling my own solution for X-Y motor control.  The starting point was to imagine the simple case: 45-degree line, square pixels.  In that world, you step once with each motor, and delay the appropriate time such that you don't go over the max pulses per second for either motor.  Better, you do some kind of intelligent step delays such that acceleration is possible.

I knew that the scanner had much higher resolution than the printer carriage, so I wasn't dealing with the simple case.  Most of the time, the X movements would have much higher step counts than the Y axis.

So instead, consider the opposite extreme case, 1000 steps in X, and only one step in Y.  To handle that, I figured no matter what, I'd have to step 1000 times along X.  It's when I hit the 500th step along X that I transition the Y axis by one step, so it's a rounding function.

In general, you have a system where you have a major axis running m steps, and a minor axis running n steps.  No matter what, you have to step m times.  If m and n are the same, then you step the same number of times along the minor axis.  But generally that's not the case.  So, instead you step each time along m, and check where the pen should be each time using a ratio.  So if "i" is the number of steps traveled along the major axis and you're trying to move m steps, and j is the number you've travelled along the y axis and you're trying to move n steps along y, then you end up with something like this:
step along major axis
i = i+1
newj = round(i/m * n)
if newj != j, then step along minor axis
keep going until i = m and j = n

Because I am using shift registers for the motors, I also can send a single latch shift command to both, and get both axes to move in a single shot.  So, supposedly if I could see this under a microscope, you would not see a step function of x and y movements.  Rather, you'd see linear motion along x, and periodically a 45-degree line for both x and y.

There are other complexities to this: having to handle different directions and having to swap around all the variables when y is major and x is minor, but the concept remains the same.

To test the code, I set up a "testxy" input command that would move both carriages along a 45 degree line to print a diamond.  Initial tests had no pen involved, but eventually I bodged together a pen, so here's what it looked like.  It would draw the diamond pattern, then move off by a little bit, and then you could draw another one next to it for comparison.
testxy output - diamond pattern, offset 10x, 30y each iteration

 "What's all that other mess?", you might ask.  Well first we have to understand the science behind my super-fancy pen carriage.  It's a block of wood with a hole drilled through it, just big enough to grip onto the pen.  The rubber bands hold it to the printer carriage, but loosely.  If there's not enough rigidity to the system, the pen bends this way or that, and you end up with curvy lines.

Also, you might notice this piece on the image:
That's showing up because I did not have a flat surface underneath the drawing area.  There are holes in the metal bed of the 4180, and so you're seeing the pen dipping down into the hole here.  It is kind of cool, though.  Reminds me of old vector graphics drawings of 3-dimensional functions.

The tape dispenser acted as a convenient weight to lift the pen a bit higher, but that put strain on the motor and belt.  The main thing I was trying to do was to get the pen to the right height.  Too much force on the pen meant that the pen tip would dig into the paper, and then that leverage would be enough to bend the rubber band... It was just bad.  So eventually I ditched the weight, clamped the block of wood to the pen carriage, and adjusted the pen height by moving it a bit up or down within the hole in the block of wood.

Clamped pen carriage assembly.  (Spoiler: this shows the star and circle operations described in later posts.)

Frankenplotter beginnings

So this is where the build of the Frankenplotter started.

I'd read somewhere -- probably on the post that you can google for "Frankenstein Laser Engraver" -- that you could take apart an old scanner and hook an old printer carriage onto it, and get the beginnings of X-Y motion.  I also was looking into building a DIY CNC and a DIY laser cutter, and Jake was looking into building a 3-D printer.  All of them have the same basic needs: three-axis control of motorized instruments in a precise manner.

Here are some links. Hopefully they continue to point to good stuff and withstand the tests of time:
http://buildyourcnc.com/CNCElectronicsandWiring.aspx (and related pages)
http://www.instructables.com/id/Frankenstein-Laser-Engraver/

 I had an old Epson 4180 scanner that wasn't working any more.  It may not have been working simply because I had fried the 24V 1.4A power supply for it.  I pried off the top cover, which required breaking some plastic snap-in fittings on the inside.

Before:
Epson 4180 with hinged cover removed
After:
Epson 4180 with glass surface removed

Fascinating little beasty and beautifully geared stepper motor.  The motor is in the top-left corner of the picture above, upside-down, connected to a nice gearing mechanism and a long motor band.  It moves the scan carriage across the sheet.  The white bar on the scan carriage is its light.  There was a mirror inside the carriage that would reflect the lit page back into the carriage and then focus it via a prism onto a board containing a sensor, so effectively it was like moving a little digital camera across the page.

The next thing I did was to mount the Frankenprinter carriage atop the scan carriage.  The picture seen here is the Brother printer carriage.  (I can tell because of how the ink cartridge is shaped, with its little aqua-colored tab.)

Epson 4180 scanner carriage with Brother printer carriage mounted to it

After that, I just had to figure out the wiring to the Epson stepper motor.


In initial tests, I was surprised to find just how precise this thing was.  The gearing of the stepper combined with half-stepping yielded a resolution of <> mm per step.  That was about 40x better than I was getting with the Brother printer carriage.

Tearing apart the Brother printer, initial X-Y axis movements

Following messing around with single axis control of the Frankenprinter carriage, I went on to working with two axes.

The victim this time was an old Brother printer.  It was already fairly well messed up, having come from a scrap heap.  Unlike other printers I'd looked at, this one appeared to have been assembled like a Snap-tite model kit.  For the most part, it amounted to finding different lever points, pushing here, prying there, and it would come apart.

What it left me with was a fairly nice assembly that had two stepper motors, one for its carriage, and one for its page scroller.  There were some spring compression bits that would help make sure the page stayed put.

I did the usual dance with the steppers: check for continuity and resistance.  Continuity would show the where the paired windings were.  Resistance would help distinguish between the endpoints and center taps, connections between endpoints having twice as much resistance as a connection between an endpoint and a center tap.  After that, I wired each stepper to the existing Arduino set-up (the outputs of shift registers going to my motor boards, and then outputs of motor boards going to the motor wires), and sent a series of single-step commands to the motors to determine proper order of wiring.

Very soon, I had two motors at my disposal, but code for driving only one axis.  But the main thing was that I had the ability to drive each axis a step at a time, and do so repeatedly, so I also measured step distances and got timings for non-stalling pulse frequencies (the inverse, actually -- max and min delay times between pulses that would work both in direct step mode and using the cosine-based acceleration code).

The trick then was: how would I handle dual motion control?  I connected the code to the x-y motion of the optimouse for input, but it was clear that the system wasn't really handling the motion the right way.


At that point, I decided it was time to move on to making the Frankenplotter really work with a scanner bed for the X axis and a printer carriage for Y.

Sunday, June 16, 2013

PS2 mouse and optimouse Arduino projects

Once I had the Frankenprinter carriage working, I got interested in making it move according to some way other than issuing step or acceleration commands.  And since I'd been interested in how the H-P printer was using a barcode-style mechanism for movement feedback, I went down the path of getting a mouse for input.

Here are a few pictures of the H-P barcode strip that inspired this mini-project.  This is a plastic strip held under tension and mounted parallel to the printer carriage rod.  The barcode chip's sensor is mounted to the ink cartridge holder, and its optosensor shines light through the strip to a sensor on its opposite side.


The band looks like a gray bar to the naked eye...
But under magnification , you can see the individual stripes that the barcode-reading sensor sees.

HP printer ink cartridge "barcode" board optosensor with plastic positioning strip
6/18/13 update: found this link
http://www.iceinspace.com.au/forum/archive/index.php/t-74481.html
as a result of tearing apart an old H-P 720 inkjet printer.  The chip on the image above appears to be a 9866, where the one I got from the 720 is a Q9863.  Very intriguing.  That page links to this:
http://www.mindspring.com/~tom2000/Delphi/Codewheel.html#Optical%20Encoders
which is also very cool.  Add that back to the future project list!
Considering Jameco part 1991475, all of $0.25, for the Schmitt (Schmidt?) NAND gate to get square waves, then tie output to triggers on Arduino, and see what happens.  But once I get there, I'll also have to keep in mind the digitalFastWrite/Read approach
http://www.hessmer.org/blog/2011/01/30/quadrature-encoder-too-fast-for-arduino/

I picked up two old mice.  One was an old-school ball mouse on a PS/2 serial port, and the other was a USB optical mouse.  I also got a few things at Weird Stuff that made wiring it easier.  They were the interface ports from PC housings that allowed me to plug in each mouse, and use the wire outputs on the other end.
Ball-type mouse with convenient PS/2 connector that gives me access to pins
Ball-type mouse with cover removed.

The PS/2 serial mouse was easy to set up.  There were several example implementations available online that amounted to sending signals to the data and clock lines with appropriate delays, and roughly obeying ACK and NACK sequences.  For the online code I saw, it didn't really obey the full sequence of the PS/2 serial protocol, but it was good enough for me to mess around with the data.  Once I had it going, I had a basis for accumulating X and Y positions, and if I wanted them, button press and Z axis (wheel) values.
Ref: http://playground.arduino.cc/componentLib/Ps2mouse
Ref: http://www.computer-engineering.org/ps2mouse/

The innards of the PS/2 mouse were really cool.  They use spinning wheels with slots cut out -- so it sort of looks like a black sunflower -- and then the wheel's edge is running through an optosensor of some sort.  The mouse ball, through friction, rotates the spindle which is the stem of the black sunflower.  The optosensor is fancier than a plain old optosensor, though, because it must be able to detect forward and backward motion.
Ball-type mouse innards.  The black and clear pieces are the optosensor and diode.

But what's hack-unfriendly is that the optical sensor and light blockage system requires precise placement of parts in order to work.  You can kind of fake the function by slotting something other than a black sunflower plastic piece in there, and sliding that through the optosensor gap, but it has to be maintained at the right location (distance above optosensor base, distance from LED and/or photo detectors) to work.  Plus, the system may have dual blockage detection, so a bar-type block strip might not work.  It might depend on the shape of the device that blocks the light.


One thing that I found along the way as inspiration was a YouTube video of a guy who'd connected up a robotic arm, and set up combinations of mouse gestures to define what the arm should do.
Ref: http://www.circuitsathome.com/mcu/controlling-robotic-arm-with-arduino-and-usb-mouse
And you can get some robotic arm kits for about $50 now.  Yet another item for the future project list.  I think it'd actually be neat to record the movement gestures of a human, and also record eye tracking, so that a computer could play it back and understand what a human is looking at in order to know why certain movements are being made.

I then coded up the Arduino to move the carriage head according to mouse movements.  But there was a general problem: collecting mouse movement info via PS/2 using existing libraries was not interrupt-driven, and relied on repeated polling.  So, while the motor was moving, it was easy to lose mouse motion information.  And, I think, making it interrupt-driven would eat up the few interrupt pins available on the Arduino Uno R3.

The initial code structure would pick up a movement made by the mouse, and then immediately would try to move the motors based on that data.  It was a frequent sample-move-sample-move kind of operation.  But, these resulted in having many very small mouse movements, and with more frequent polling, it'd get smaller steps.  Short distances meant low likelihood of running the full acceleration sequence, resulting in very jerky motion by the motor.  There was no look-ahead.

I tried an alternate implementation that blended in the Arduino "smooth" code, thus averaging the last n mouse moves, and combined that with a "stopped" detection (last m mouse positions are the same).  That was a bit better, because it'd wait a bit until I'd stopped moving the mouse, and then move the carriage head a longer distance.  But from a usability standpoint, it felt less satisfying when handling rapid direction reversals, because those would just get averaged out.

For a second attempt, I pulled apart the optical mouse that had a USB connection.  Before going there, I'd hoped to read USB directly, but that required running the Arduino Uno R3 as a virtual USB host, and I didn't have the motivation to do all of that.  If I'd had a later Arduino, I could have done it, since other Arduinos have USB ports built in.

I followed examples online to rewire the optimouse.
Ref: http://www.martijnthe.nl/2009/07/interfacing-an-optical-mouse-sensor-to-your-arduino/
I found it was a little tricky at the part where you're removing the black piece that covered the chip, and I wanted to do that to try to identify the chip.  It was connected to the LED that lights up the area that is being viewed by the chip, so getting the black piece up off the sensor chip required some bending of LED leads.

Once past that, I found that the chip didn't exactly look like the ones referenced on the page, but some came close.  I did a fairly poor job at soldering directly to the chip, but eventually figured it out.  The good thing is that the mouse's innards for an optimouse are a lot more spacious, because the physical form factor isn't stuffed with the mouse ball and black sunflowers.  So, I took the soldered wires, connected them to the four wires of the original USB wire, and stuffed it all back into the original mouse housing.  I'd effectively circumvented the USB circuitry, which also meant that I ended up with no button or Z axis data.  (Note in the picture below how the chip-soldered wires go to the white connector and out to the USB cable, and the white connector is no longer plugged into its housing on the board.)
Innards of optical mouse, rewired, connected via USB port to 0.1"-separated pins for direct breadboard connection


So at this point, I had a not-really-USB optical mouse sending data through a USB cable, then that connected to a PC housing's USB ports, yielding four wires on the inside that I could use.  I then wired and coded according to the Martijn The web site, and through some experimentation, determined that I could use either the PAN3101 or ADNS2051 specifications.  I ended up having a second mouse that I could use for controlling printer movements.  I haven't tried using the full ADNS2051 register set to see if I could get image data from the built-in 16x16 camera, and I'm not sure if it would even obey that command set, so that's another project for the future.

More recently, I've picked up an optical mouse that runs through a PS/2 serial interface, so if I ever want to use it, I should be able to use the PS/2 serial mouse code and go with it.  The original idea was that I would be able to attach the mouse itself to something driven by the motor, and use the mouse data to tell me where things are, but that's not needed now that I have precise stepper motion in the Frankenplotter.

I did have some project thoughts along the way with this.  The one that would seem fun would be having the mouse act as a tail to some kind of wheeled robot, thus providing position feedback to the robot -- kind of like a chariot, where the mouse is that chariot behind some horses.  But, the mouse doesn't convey rotational movement around the Z axis (yaw)  so unless I could sense that, it wouldn't really work.  But, having two mice orthogonal to each other and having that at the end of a rigid tail... now that might be interesting.

[ Edit 7/3/13 ]
I felt it important that I reference this article from here.  Without someone having invented the mouse, I couldn't hack a mouse.
http://blog.sfgate.com/techchron/2013/07/03/doug-englebart-a-computing-giant-passes-away/